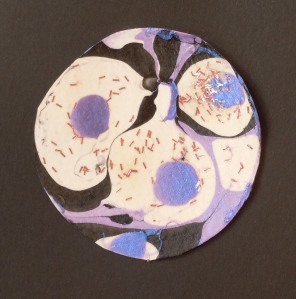
Dandelion Time

Who doesn’t love picking  a dried dandelion and blowing the seeds into the wind? A wish, a bit of wind and away they go.

I was inspired by this picture on Artsonia. It is super simple and relaxing for any age.

A few Qtips, paint and cardstock and a soft blow into the wind and they are off…

2 Comments

Filed under Art for Kids, Summer Crafts

A Little Abstract Art and a Leaf Print or Two…

We woke up at the crack of dawn again this morning, still getting over some jet lag. A cup of tea, a walk around the garden and it was time to pull out some paints and get busy!

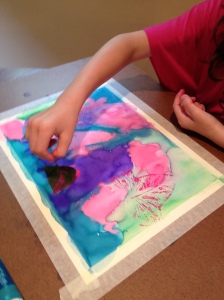
We pulled out liquid watercolors and just smooshed them all around. No real rhyme or reason, the girls loved playing with the colors.

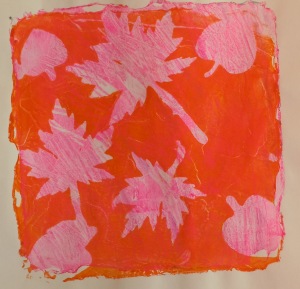
Next we used printing ink and a brayer to apply the ink to leaves from the garden.

We pressed them over the dried watercolors with wax paper to keep our fingers clean.

And this is what we ended up with. A bit on the busy, bright side, but fun and creative and not super messy. It was doable at 7am with children, that must be pretty easy!

2 Comments

Filed under Art for Kids, Summer Crafts

Ahhh…summer crafts!

Ahhh…the lazy days of summer. The cicadas are singing, the sprinklers are running and the sun is shining. We just returned from a wonderful early summer vacation and the girls and I had some time this afternoon to root through the craft cupboard and rediscover the joy of a button box. My mother had one when I was little and I remember hours spent sorting, examining and just the tactile sense of picking up a handful of shiny buttons.

I am a bit obsessed. I have been known to do a happy dance when finding a bag of new buttons…seriously – ask my kids!

I wanted a cheerful necklace to go with a plain t-shirt I was wearing so why not use buttons? Here are a few we came up with:

I had some stretchy elastic and added a few beads. Pretty simple with a bit of pop? At least that is what we were hoping for.

Next up was a card with a stitched button. I have seen them all over Pinterest and wanted to try out one for myself. Here is what I used:

I want to make a bunch now! Super easy and the kids are all over it. Ahhh…summer!

Stay tuned for more creative crafts to honour the summer. Happy creating.

6 Comments

Filed under Art for Kids

Gelatin Prints

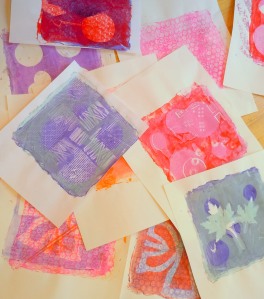
My kitchen floor is covered in a pile of prints. Take a look:

I have fallen head-over-heels in love with gelatin printing. It is so easy, inexpensive, creative and almost any age group can do it. I first became inspired by artist and print maker, Linda Germain. Check out her video on how to make the gelatin plate.

I used a cake pan for my gelatin mould and I needed 2 cups of water  and 4 packets of Knox brand gelatin. I followed the directions and voila, my sparkling gelatin printing plate.

Next I gathered my printing ink, brayer and old cookie sheet to prime my brayer. And then it was time to print. I used lots of item around my house to create prints and texture, an old credit card, bubble wrap, a few leaves from the garden, a wine cork and paper cut-outs in different shapes.

My kids joined in the fun and we now have a stack of mono prints thanks to a little box of gelatin…who knew it would be sooo easy? And fun? And addictive, I think I have about 50 prints now…

2 Comments

Filed under Art for Kids

Sketchbook Inspiration


I thought I would keep the sketchbook theme going and tell you about two new books that I am head-over-heels in love with.

The first one: 

The Art of Urban Sketching by Gabriel Campanario takes you on a whirlwind trip around the world through the eyes of urban sketchers.  As he explains, “The beauty of sketching is that, almost by definition, a sketch can be completed as simply and quickly as you like.” The book is a showcase of talent from all over the world. The sketches are as diverse as the people and the scenery.

Campanario really knows what he talks about as he is the founder of the nonprofit organization, Urban Sketchers. Each artist has a small bio, description of how/when and maybe why they sketch and the materials used. I found it fascinating to get a peek at their process. Each time I flip it open I see something new and different.

The second book is:

Drawn In by Julia Rothman also gives you a peek into sketchbooks but differs in that the subject of the sketches is totally different. This book has a similar format, a short bio of the artist and a few interview questions follow. The variety of styles and subject matter is my favourite part of this book.

Who doesn’t like to peek? To see behind the scenes? I love the roughness, the thinking you can see on the page.

Now, where is that sketchbook? Time to get busy. Here are a few pictures I took on a walk yesterday…maybe inspiration for a page?

What inspires you? I would love to hear…happy creating.

Leave a comment

Filed under Uncategorized

Sketchbook exercise…

Get a sketchbook, it just might change your life…seriously.

I know mine did.

I love creating, dabbling, sketching and trying out new ideas but when I am in the ‘creating’ phase nothing will stop the flow quicker than an expensive piece of paper or canvas. I need a place where I can make mistakes and try new things. A sketchbook gives me permission to fail, to make a mistake, to experiment without fear. OK, at least with less fear…

Here are a few of my latest dabbles…

I love trying a zentangle or two to warm up a blank page. The one above is from JJ, she has a flickr page with step-by-step instructions on how to get started.

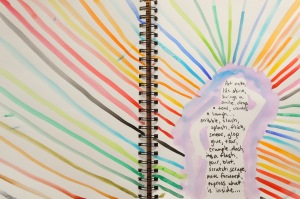
I recently stumbled upon an amazing artist, Julie Fei-Fan Balzer. She created the above project as an art journal page. I wanted to try it out for myself before I teach it to my students.

Spring flowers and a micron pen…nothing can be easier than that. I drew this while my kids were busy playing in the backyard. The birds were chirping, the breeze was blowing and the sun was shining.

Here is another take on flowers:

10 minutes a day in your sketchbook will warm you up, help you work through your fears and distill a few ideas. Give it a try…

1 Comment

Filed under Uncategorized

Nail Polish Art

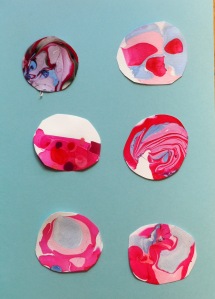
Its been a little psychedelic around here. I was inspired to pull out the polish and get creating by the amazing Carla Sonheim. She was watching a tutorial on a marbling technique for painting your nails here  and came up with this great technique using watercolour paper.

Soooo…grab your nail polish, watercolour paper, a disposable cup, a rubber glove, some newspaper and get going!

I must warn you though, that this is definitely an outdoor activity. My girl’s and I did it this weekend inside and I ended up with a horrible headache…go outside to avoid the fumes.

  1. Fill a disposable cup with water almost to the very top.
  2. Have a few colours of nail polish open and ready to apply.
  3. Simply place a drop of nail polish on the water and add different colours. If you want a marble effect use the end of a paper clip and drag it through the colours. ****Work fast as the polish dries fairly quickly and will become gummy and unworkable. It takes a bit of practise and experimenting to get it just right, have fun with it.****
  4. Cut a circle of watercolour paper that is slightly smaller than your disposable cup and drop it on top of the polish. Press it down and bit and use your paper clip or finger to pull it out. Place it on a newspaper to dry. And voila…

After you have removed your paper from the cup use your paper clip to drag across the surface of the water to clear away any nail polish residue.

After the paper dries (20 minutes should do it) you can arrange a few on a your choice of coloured paper. I love the way they turned out and I have to say we had an absolute blast making them, aside from the migraine that is.

We went a little crazy…

Check out Carla’s amazing blog to see her creations. Stick around and become inspired by her amazing work, I know it always works for me!

1 Comment

Filed under Uncategorized

Tissue Paper Stained Glass Craft


The grey days of February have been officially banished from our house. At least we are trying…

The girls and I grabbed a pile of tissue paper and set out to make a stained glass garden for our back door.

Cut a large piece of wax paper and fold it in half. Open it up and fill one side with torn pieces of tissue paper. When it’s filled and arranged the way you like fold over the other half of the waxed paper and place between two towels and iron until the waxed paper has melted enough to stick together.

Next we traced ‘garden’ shapes onto black paper. We cut the shapes out and then I used an exacto knife to cut out the inside, creating a black frame for our tissue paper background.

Grab a glue stick and attach the frame to the waxed paper. Cut away the excess waxed paper and tape on  a window.

Ooooh the colour! The magic of transparency has transformed our back door. February has never looked so good…

3 Comments

Filed under Art for Kids

Create Some Colour with DIY Tulips


I need some colour in my life! The grey days of February are getting me down…anyone else? Mother Nature isn’t providing a colour break so I rolled up my sleeves and created my own.

I knew I wanted to use bright coloured paper with variation, not  flat coloured card stock.  I didn’t have any so I grabbed my sketch book, some ink in pink, blue and plum and painted a few sheets. Nothing is quite as therapeutic as spreading colour around a white piece of paper. Try it and I guarantee an instant mood lift.

Let your colourful papers dry while you make a few templates for the petals. I used an old cracker box and drew a vaguely heart-shaped petal.

The large petal measured 5cm wide and 5cm high and about 2cm at the bottom. The smaller petal was about 4cm x 4cm.

Now its time to cut, cut, cut. For each tulip you will need 6 large and 2 small petals.

After the petals are finished cut a small slit in the bottom and glue the ends folded over. Either hold the ends together until the glue is dry (could take forever) or use a clothes pin to keep it together like this:

For the base of the flower cut out a quarter sized circle of paper and glue three of the large petals to the circle leaving a small space between each one. Then take the last three large petals and glue them on top of the first three filling in the spaces in between. Lastly, take the two smaller petals and glue them on top. For the center I cut out a spiral shape from a piece of yellow paper and rolled it up and glued it on. I used flower wire taped to the bottom of the tulip as a stem.
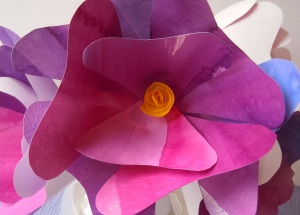
Ahhh…colour. That feels better already.

For this post I was inspired by fellow blogger, Patricia Zapata, at A Little Hut. She is an amazing graphic designer, crafter and author. Please check out her tutorial for a paper flower gift topper.

Happy creating everyone…

I am linking up to:  makingtheworldcuter.com, Skip To My Lou, Type A, Katie’s Nesting Spot, Crafty, Scrappy, Happy,


1 Comment

Filed under Uncategorized

Art for Kids: Inspired by Gustav Klimt


The other day I was driving through my neighborhood when a bright orange sign caught my attention. I slammed on the brakes (after quickly checking my rear view mirror – safety first!) pulled into a parking space and just sat staring at a new store. An art supply store. Cue dramatic music…

Although I live in a huge city, Toronto, our neighborhood was totally lacking in a good quality store to buy my favourite things in, art supplies of course! Before this lovely location opened I would go on an epic trek downtown, stock up on supplies and fight the traffic or hop on the subway home. This is a life changer for an arts and crafter like me. And it helped me gather the supplies I needed for my next ‘test project’.

I have been working my way through  The Print and Stamp Lab by Traci Bunkers.

It’s a great book for beginners (like me) and shows you how to turn just about anything into a stamp tool or printing block. I scooped up a brayer and block printing ink at the art supply store and quickly got to work.

Gather your supplies:

  • foam plate (this is a recycled meat tray)
  • black paper, (use a good quality paper, I used Artagain)
  • brayer
  • block printing ink
  • metallic pens
  • ballpoint pen to carve the foam with your design

I have had a Gustav Klimt project on my to-do list for a few months. I found it at Panther’s Palette, a great blog by Pam, an art teacher.

I started by using a ball point pen to carve a whimsical tree onto the foam. I then squeezed out a dollop of printing ink onto the back of a baking tray and rolled my brayer across it.  Then I rolled the brayer across my carved foam and tested it a few times to see how it worked.

I was disappointed with the foam tray I was using. It was quite uneven and it was difficult to smooth the paint across. The next time I try this project I might use a linoleum block and carve it or just try to find a smoother foam. Also, I tried regular acrylic ink and it was too runny and filled the carved lines.

And there you go:

I have fallen in love with my new brayer and can’t wait to try a million more projects. Kids from about the age of 6 onwards would be able to complete this project. There are so many variations to try.

Let me know what you think…comments totally make my day!

1 Comment

Filed under Art for Kids